Wednesday, 18 July 2012

"Remember the Moment"
by Jan Rankine


Hi everyone I've just finished this layout using some more of Green Tara's fabulous products.


This satin edge organza ribbon is so easy to work with and makes such a beautiful bow.


I love the rich colours of these gorgeous flowers.  The roses are red and I added a little bit of copper paint to tone them down a bit to match the larger flowers.


This pic shows up the copper paint highlights pretty well I think.


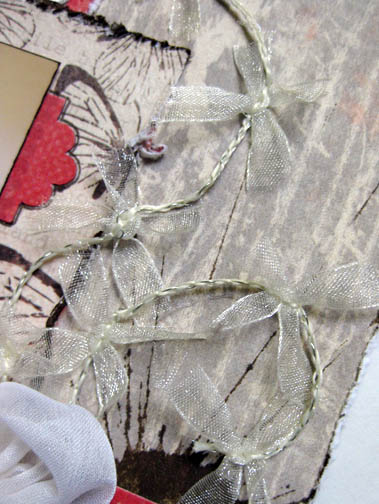
Lastly I added some Gold Beaded Garland Trim, some Olive Loop Trim & finished off with some Green Velvet Leaves just to add the finishing touch to the page.

Green Tara Products Used:
 7mm Loop Trim  Olive
CODE: RBDAOl
 8mm Bead Garland, Gold
CODE: RBY16G
 3cm Red Roses
CODE: FDR024R

Thanks for stopping by the blog today.
Jan  xo

Tuesday, 17 July 2012

Flowers Tutorial by Vickie Alberto

Almost all plain economical scrapbooking flowers are made from mulberry paper. Green Tara's newest white petals are especially thick which makes it easy to create these flowers:


They look like pretty fancy flowers but all I used was 4 layers of Green Tara white petals (2 of each style shown below) and a decorative centre. You can use other styles than I chose but you'll want the flower to be a big size (at least 2 inches/5 cm) with wide petals. This won't work very well with daisy style flowers.

You will need:
- 4 mulberry flowers layers
- a Q-tip
- warm water
- firm toothbrush
- decorative centre

Bottom layers (2 of these) Green Tara Code PFLP01:


Top layers (2 of these) Green Tara Code PFLP143:


Decorative center (your can use anything to match your project style!) Green Tara Code XF5034lv:


Instructions:

Step 1: Working with one flower at a time, take a wet Q-tip and "paint" the only the very edge of each petal with warm water. Do this to the 2 bottom layers and 1 of the top layers.

Step 2: With dry fingers, pull off the wet edge of the petals in 3-4 small tugs of each petal. Let dry without damaging the fuzzy edge you just created. HINT: I left one of the top layers plain (didn't fuzz the edge) to have contrast since my flower is all white.

Step 3: Once the 3 fuzzy layers are dry. Brush them with the firm toothbrush bristles to fuzz them even more. Stroke the bristles from the middle of the flower outwards.

Step 4: Glue your layers together and add the decorative center.


That's it! So simple yet so elegant and expensive looking. Another alternative is using your flower punches/dies to make your own petal layers too. Green Tara sells all kinds of beautiful mulberry paper in any color imaginable.
Thanks for visiting the blog today!
Vicky

Sunday, 15 July 2012

A Layout & Card
By Guest Designer Heather Jacob


Hello everyone. Heather here again.  I wanted to show you a layout I did recently using some more beautiful Green Tara Fabric Flowers. My background here is actually a paper that looks like lace.
It is from 7Dots studio created by Finnabair from Poland  the lace looks so real doesn't it?


With this paper I wanted my layout to be simple so I have just used
strips of paper and lace and the clusters of Green Tara Flowers. 
Green Tara Products Used
 Green Tara Roses
Green Tara  "Poppy" Flower.
 
 A Card using Green Tara Flowers & Leaves


 Here is a little Card I made with a matching pocket. I have embellished it with some lovely
 Green Tara goodies of course.


I do love these rich coloured Green Tara Leaves at the top of my cluster. Icing on the cake really!!
I like the fact that they have a wire through them so that you can twist &  poke them to whatever shape you want & they stay in place.


These Green Tara Roses come in lots of different sizes & colours too.


Thanks for calling by & I do hope I have inspired you to use some flowers on your next project too.
I will be back later in the month to show you another project I have created using the lovely
 Green Tara goodies.
Heather  xo


Thursday, 12 July 2012

"Nine Months" by JJ Sobey


Hello bloggers, thanks for calling by. Today I took another opportunity to pair Green Tara flowers and trims with Authentique papers - I really  like how they work together.


I used the organza Butterfly Trim on this one again - it's definitely captured my attention a lot lately.


I placed one of the delicious new Camelia blooms on this page, and paired it with a couple of the Sakura blooms. 


 The loops of ribbon were created with the 3mm stitched grosgrain.
The self-adhesive Flower Garland sticks really well - I was pleased to realize I didn't need to add any glue to get it to stay on the textured paper.

Green Tara Products Used

Flowers - Sakura 5cm coral (XF9221Cor)
             Sakura 5cm Ivory (XF9221Iv)

JJ Sobey

Monday, 9 July 2012

Welcome to our
Guest Designer
Heather Jacob

Hello everyone. Thanks for calling by the blog. Today I am so very pleased to WELCOME our 
"Guest Designer" for July, Heather Jacob.
We are so very fortunate to have Heather aboard this month to show us some pretties she has created with our very favourite "Green Tara" goodies. Heather will also be back later in the month to share some more inspiration with you, so make sure you check back in later.
Cheers Di  xo


Hi there, my name is HEATHER JACOB.
Firstly I am so honoured to be here as a guest designer on the fabulous GREEN TARA … Thanks so much Di for asking me .. I was totally thrilled and surprised to receive such a generous, beautiful big box full of goodies for me to play with, pure delight.

Now a little about me, I am blissfully married to my wonderful, supportive “soul mate” BADEN. Our treasured family, all feature throughout my work. There is nothing more important to me than my family. Creating art is one of my many passions in life .. I discovered scrapbooking in 2003 and to me this craft is the perfect combination of art, photography, beautiful paper, and glorious words. I can incorporate all the arts and crafts I love in one hobby. I especially love that there are NO RULES !!
My books are a reflection of my life, my history, my family and friends. Also who I was yesterday and who I am today. My addictions at the moment are definitely Stitching, layering, stamping, texture paste and paint, and monochromatic themes. Off the page projects and altered art are a fave of mine. Tags, cards and mini books .. My style is “CLASSIC” with attention to detail…and a little shabby chic thrown in..
I teach classes at “Seriously Scrapbooking” in Adelaide and I am lucky enough to be on a few design teams : Imaginarium Designs (chipboard), CSI, The Color Room, Meg’s garden, Scrap for Help, ASI magazine.

"Cousins" Layout by Heather Jacob


I like to use flowers in clusters .. sometimes just poking out from under some layered papers.
Here I have used a small cluster of 2 flowers and a bling element on the left side of the photo.


I've  repeated a larger cluster of black and ivory Roses mixed with white Cherry Blossoms
 and a Flower Spray.


 Another small cluster is mixed with other elements on the bottom right side of the page .
I adore these new Lillies and found them delightful to work with.

Green Tara Products Used
“NEW “ Callie Lillies Ivory with pale lemon stamen
CODE FDN051Iv
Tiny black Roses
CODE FDR001BL
3 cm Large black Roses
CODE FDROO1Wh
1cm Small ivory Roses
CODE FDROO1IN
3cm White Cherry Blossoms
CODE FLC22wh
Flower Sprays cream 19 cm in length
CODE PFSTC100

Thanks for calling by & don't forget to pop back in later in the month as I have more to share with you.
Heather xx


Friday, 6 July 2012

Soap & Bubbles
By Tina Dalton


Hello everyone, so glad you have stopped by the blog today so I can show you this layout I have done of  my gorgeous Grandaughter.


I have used Kaisercraft ‘ Lakehouse’ papers along with a Dusty Attic Bird Cage from the latest release.


GREEN TARA PRODUCTS USED
Camellia Flowers 8cm ivory sprayed with ‘Crème de Rouge’ Glimmermist and Smooch glitz &
added – Pink Fizz
Sakura Flowers5cm silk and pearl flower Ivory lightly sprayed with ‘Sugar plum fairy’ Glimmermist
& Cherry blossom Pale pink
 Roses 3cm White sprayed with ‘Sugar plum fairy’ Glimmermist
Flower Sprays in Pale pink 

I didn’t have the right colors I needed in my flower stash to complete my layout so I used Glimmermists on these flowers and viola,  had the perfect color. I must admit that I tend to buy more white or cream flowers now days, with there being so many different color sprays eg : Glimmermists etc  its so easy to change them to the perfect color to suit your project.
Green Tara have a perfect range of flowers so there is always something to suit. 

Cheers   Tina Dalton


Tuesday, 3 July 2012

"No Name" Page
& A Mannequin Fairy
By Linda Thompson

 "No Name Page"  Please help me name this page!!! 
This is an early 1980's photo of me,  no idea when it was taken or the details surrounding the time, my mind had drawn a blank so please if you have any ideas on a title please do share. 
I wanted to use some paper I had stashed away for years, something you would probably look at now and say oh bin it how ugly lol. So I started with a lime green piece of paper that came with flocked flowers on it, I then added some texture paste with a credit card over 3/4 of the page to the right where the photo is, and added some spray mists to tone down the green of the paper to make it a little more yellow, 

I then used a glimmer mist butterfly screen and more glimmer mist to create the butterfly and a few more drops of the teal mist here and there just to add very small details of colour and to help highlight the teal flowers.
 Using mulberry paper from Green Tara and mod podge, I ripped the paper up fraying some of the pieces and then glued them down with mod podge in 3 random bunches leaving some pieces sticking up while others were glued flat and added a little glimmer mist to colour them once they had dried.
I punched around the page with a border punch and with a teal ink then inked the punched edges. Due to the ink etc slightly warping the paper as it was only a very thin sheet I then glued the whole page to a plain sheet of white cardstock and again inked the edges.
Choosing flowers from of course Green Taras wonderful selection, I  arranged them around the photo and added some leaves and a couple of other embellishments to finish the page giving each flower a spray in glimmer mist before attaching them.
Green Tara Products used....
12x12 milled mulberry (Unryo) - white CODE: 1212MWh10
Leaves Paper - Green leaves in several sizes
Apple blossoms - white CODE: FDV044Wh - sprayed yellow
Apple blossoms - Pink CODE: FDV044P2
Apple blossoms - Pink/White CODE: FDV044P
Gardenia flower - Tourquoise CODE: FDV054Tu
New Camellia - Turquoise CODE: XF9219Tu
Petals in 7cm & 4cm white & pink
Lattice Ribbon - Ivory CODE: RB6735Iv

"Mannequin Fairy"
 I have had this paper Mache mannequin floating around my house for several years with full intentions to alter her but it always just seamed to hard,  well this time I found her & I set myself a goal to either finish her or throw her out once and for all. I am glad I did finish her although now I need to find her a very safe home for her  from all the sticky fingers in my house.
I started with a mannequin with a paper body on a wooden stand that stands aprox 50cm high. I painted the body with gesso and started with the top half of her body using mulberry paper cut into small squares. I used  modge  podge to glue the pieces into a shirt pattern around the top of the bodice then doing the same with the bottom half this time using an old paper pattern brought at an opp shop. Setting aside over night to dry.
Using a strip of fabric and a strip of mesh creating her skirt, by putting mesh under the material it gives the skirt more flair.  I attached the material etc with dress pins that had a pearl on the top, just sticking them straight into the mannequins body with a little force.
Then you can go about adding more details.  I used Green Tara Paper  String around her collar and then the rosettes & lace & ribbon as a belt with some left to dangle, also adding a bow in Green Tara ribbon. Wooden flourish was distressed with white crackle paint and mini roses had just the tips rubbed on an ink pad to give them a little colour.
Wings were created using some tattered angels chips and glimmer mist and random feathers from junk shop. 
Green Tara Products used.....
Paper String - white CODE: PSWh - to create top neck line
Herringbone Ribbon - Dusty Pink  CODE: RB405DP - to create ribbon bow
Bud n bow ribbon - ivory CODE: RB6761Iv - to create the belt and sash
12x12 milled mulberry (Unryo) - mint CODE: 1212MMi10 - to create the bodice top
3cm roses - ivory CODE: FDR024Iv - tips have been inked in teal
2cm roses - white CODE: FDR009Wh - tips have been inked in teal
1.5cm roses - Lavender CODE: FDR003L
Gardenia flower - Cherry CODE: FDV054Ch - bottom of stand
Poppy flower - sea green CODE: XF9212SG - bottom of stand

Till next time Linda